
So, you’ve seen the Volks Violin case right? You probably think that it looks like a sturdy and stylish way to store and transport your doll. It seems like a great thing, but the price can be a killer as it’s pricey. Also, maybe you want something a bit more custom, something a bit more you. Well then, what you need is this guide to make your very own custom Violin Case for your dolls.
___________________________________________________________________________
I’m not the type of person to often carry or take out multiple dolls, but I use public transport to get out and about so my bags often get squished, squashed and beaten about so I really wanted something sturdy and hard wearing. A violin case seemed about the most sturdy, suitable yet attractive option for me.
I’ve been documenting my progress of the mod via photographs and I’d like to share them. Please note that I did this all on my own, I didn’t have a tutorial to hand (all the links and tutorials I found were broken) so things may not be perfect, this is my first (and so far only) attempt. Still, it may be useful to someone.
___________________________________________________________________________
Step 1:
Here we have the whole case intact. I don’t want it to stay like this. The first step is to remove the small storage compartment and the neck support as marked on the picture below.

Step 2:
To remove the neck support and the storage compartment I used brute force and just pulled them out. As you can see where they have been removed, the case body is now completely empty. I needed to do this to fit a 60cm doll in. If you wanted it for msd’s only you could keep the storage compartment if you wish. I however will not.

Step 3:
Now I go ahead and work on the lid of the case. I remove the compartments and the hooks used to hold the bows. These will not be replaced in my case.

Step 4:
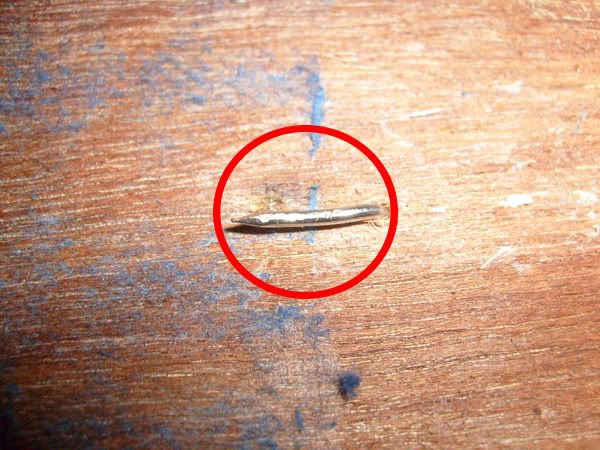
When removing the compartments and supports, I needed to remove the small nails holding them in place.

Step 5:
Removing the nails left some unsightly holes and marks in the case. I saved the nails so that I can replace them later to cover up the holes and complete the look again.
Step 6:
Before replacing the nails, I removed the blue felt from the case. This was just glued in so it was easy to tear away. I then replaced the nails.
Once I replaced the nails, I needed to bend them over to be flush with the wood. This is because without anything to hold in place, the nails just stick out and would get in the way and be dangerous. I used a hammer to carefully flatten the nail down.
Step 7:
Once the screws were flattened down, there is still some room underneath and the point. This would snag on the fabric later so I needed to cover them up. To do this I used some air cure epoxy putty. It is easy to use and will cover the nails without causing too much of a noticeable ‘bump’ when I put new fabric in later.

Step 8:
The next part is to remove the cotton wool padding. This may or may not be in all cases, but in mine it was. It was mainly from what I can tell to pad out the body of the violin and a small bit to protect the top. This was simply underneath the original fabric and was glued to the wood. This needs removing.

Step 9:
To remove the cotton wool padding I slightly dampened my fingers and then I just rolled my fingers over the wool. This bunched it up into rolls and made it really easy to remove. I then threw the wool away. I did this until all the wool was gone and the wood of the case was bare.

Step 10:
Now I attach a fabric strap to the case. This is so that the case will not fall all the way open and break the hinges. I cut a length of pretty sturdy fabric trim. To fix it to the case I just used a staple gun and stapled it at either end.
It could also easily be fixed on using a nail or nail gun.

Step 11:
The next part is to begin lining the case with the new fabric. I brought some standard fabric glue from the fabric shop and I did a test patch, it works just super on the wood and doesn’t damage the fabric.
For this I chose a fleece fabric. I was going to use velvet type fabric, but I saw this cute whale covered fleece and it corrupted me with cute, so I got that instead XD
I spread the fabric glue around the sides of the case. I then got the fabric which was cut to size and placed it on top the glue. I smooth it out as I go to get rid of any lumps or creases. I will now leave it 24 hours before adding more fabric to the rest of the case.

Step 12:
I follow the same process as above, but this time with a large piece, cut to the exact size and shape of the case. Repeat steps 11 and 12 for the upper lid of the case.

Step 13:
Next, I want to make a insert pillow, so the doll will be cushioned and safe. To do this I cut out a piece of fabric the shape off the case. Cut it larger then it has to be! This is to allow for seam room and also the expanding once the pillow is stuffed. The black line is the outline of my violin case, I cut the fabric larger then that and plan to sew just above the line. Cut another piece of fabric the same way to make the other side of the pillow case.

Step 14:
Sew the pieces together but leave an opening at one end to stuff the pillow. I used regular polyester stuffing and filled the pillow. I then sewed the open end shut. Its important not to overstuff the pillow, otherwise it will be too thick and the case will not close probably. Make it about the same thickness (or a little more, but just a little) as the pillows you get in doll boxes.
Please note! I have never sewn before and this was my first attempt, I used a machine and I didn’t follow the shape exactly right and it’s a bit straighter on one edge then it should be, my lines are a bit wobbly, but I am very satisfied for a first attempt. I can always recreate it later when I get better!

Step 15:
Once the pillow is inside the case its actually a really good fit, even though it was almost straight on one side. There is only a minimal gap and the gap is not big enough to have an impact on the doll.

And so that’s it. This was my first attempt at doing anything like this and I am pleased with the results. I may redo it later when I am more skilled, but this is more then adequate for me at the moment. Its perfect for those one doll outings!
Obviously this is just how I did it and you could change the steps to suit you if you wanted, I just thought it might be helpful to document and post my experience. I hope you enjoyed ^^.

That was a great guide. I was planning to make one for myself already, so seeing how you did it is a big help. I have an old case already, as I used to play the violin, and was planning on using it. The bow holder toggles are broken, so i figured it would be a good case to gut. I plan to use white satin fabric on the inside.
Really cool tutorial you did! I was just wondering how people might acquire a case affordably =) I actually just bought a ‘ukulele case for my SD, see here: http://img.photobucket.com/albums/v622/fantasia1940/IMG_2515.jpg
She barely fits XD but still fits. I may take you up on the interior decoration idea =)
And I have a question – you transport your dolls with their face masks on, right? I am paranoid about the face issue because my doll arrived with her eyelashes smashed from Junky Spot. :( I don’t know if sliding of the mask in a case poses a risk to her face. Any tips on this?
Yes, I always use a face protector on my dolls when travelling in a carrier. Better to be safe then sorry is my motto.
Your doll is very pretty, love her jeans!
ok, just hope the mask will do its job then. =) and thank you!
lol..cute violin case ;D..the pink whale cloth just make it soo kawaii x3
That’s really useful! I’ve just bought a case on ebay and realised that I’ll have to replace the interior – I found this with a google search :D
This is a great guide indeed! I’d love to do this with my violin case as well.
Pingback: Dollfie Dream carrier – a cheap alternative « How Do You Figure?
wow! this was really helpful! i found it funny how i was looking at the volks site right before this :P
how much does a violin case cost?
The cost really depends what case you buy, where it’s from and what kind of condition it is in. I’m sure if you look in second hand shops, car boot sales or ebay, you’ll find a nice one for a fair price.
Trying to prod my boyfriend into making it for me. XD Great tut!